
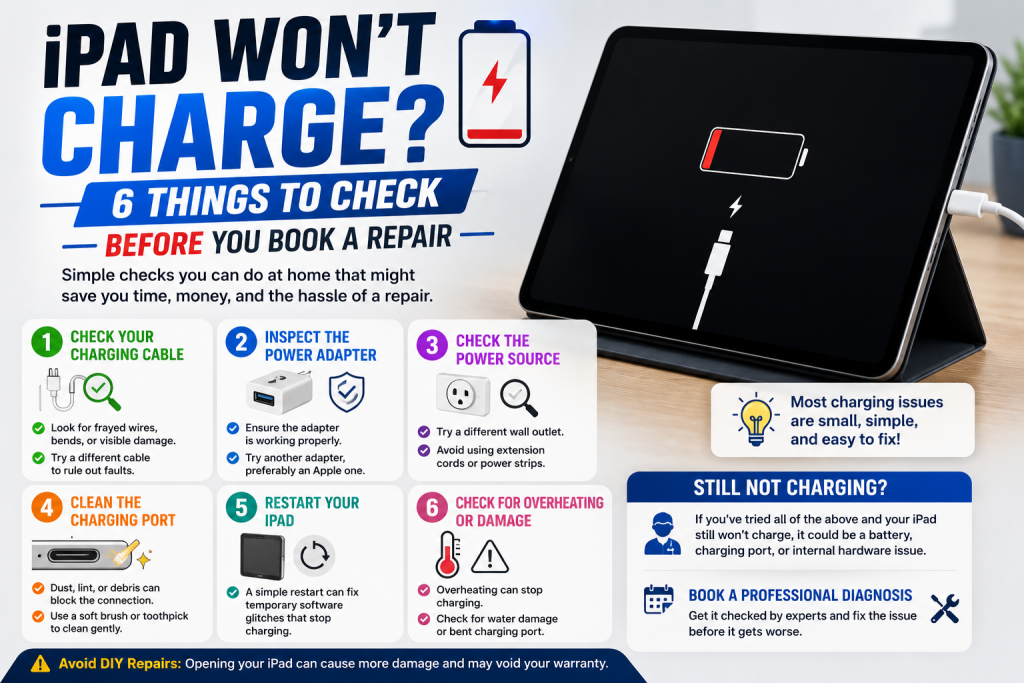
A few minutes of troubleshooting can sometimes save you a trip to the repair shop — and if it doesn’t, it’ll help our technicians diagnose the fault faster. Before you assume the worst, work through these six checks.
- Try a different cable and adapter. Cables fray internally long before they look damaged on the outside, and this is genuinely the most common reason an iPad appears to have stopped charging.
- Inspect the charging port for debris. Pocket lint and dust build up inside Lightning and USB-C ports over time and can physically block the connector from making contact. A soft brush or a wooden toothpick (never metal) can sometimes clear it gently.
- Try a different power outlet or socket. It sounds obvious, but a faulty wall socket or extension lead is an easy thing to overlook when you’re focused on the iPad itself.
- Restart your iPad. Hold the top button and either volume button (or just the top button on older models) until the slider appears, then power back on. Occasionally a charging fault is software-related and clears after a restart.
- Check for a “Liquid Detected” warning. Newer iPads will refuse to charge and show an alert if moisture is detected in the port, even from humidity rather than an obvious spill. Leave it somewhere dry for a few hours and try again.
- Look closely at the connector pins. If they appear bent, discoloured, or pushed in on one side, the port itself has likely failed and will need professional attention rather than a quick fix.
If you’ve worked through all of the above and your iPad still won’t charge, the fault is most likely the charging port itself, the battery, or the connector cable inside the device — all repairable. At Phone Heroes in Earl’s Court, we diagnose charging faults for free and most port or battery repairs are completed the same day, backed by a one-year warranty. Call 020 3397 7407 to book.